360WoodWorking is Now Open

360_HomepageIf you have not yet heard, we, Bob Lang, Chuck Bender and I, have opened the doors on our new site.

At this time there is a sample presentation, downloadable PDF, online course and full-length video of the project that is free to read and watch. In the coming weeks, we will be adding content almost every day. The new content will be free podcasts, presentations, plans and more.

From today forward, my blog will be posted at the new site. Sometime around December 15th, we will post our first full presentation, which is also free to everyone.

Please bookmark 360Woodworking.com, and check back often. we hope that you’ll find the information worthwhile and choose to subscribe, if you haven’t done so already.

Thank you, and Build Something Great!

Glen

3 Comments

Filed under Uncategorized

Youtube Lessons Learned

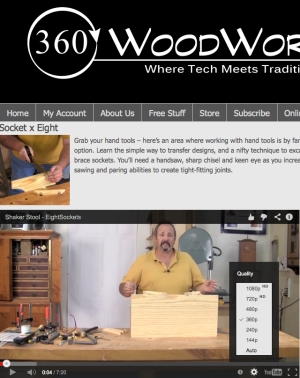
ScreenCapI’ve often wrote and always say that woodworkers are visual. I, and I’m betting that you do too, learn much more watching a short video clip than reading paragraphs of text. That’s the reason why, by the way, that  360WoodWorking.com, which is very, very, very close to opening its doors (and I promise that is the only time you’ll see me use very in a sentence that many times) is stocking up on video content.

While setting up and arranging the video clips for a free online woodworking course we’ll release in the next few days (hope, hope), I discovered two important things. I discovered that I’m in serious need of upgrading my Internet speed, and that I could adjust the quality of the videos in the Youtube-provided players. You may have known this, but it’s new to me. (Remember, it was only a short time ago that I discovered the meaning of Lmao.)

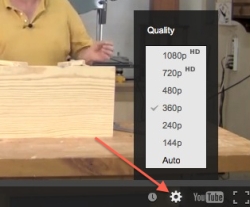
If you didn’t already know that you could adjust the player quality, it’s quite simple. ScreenCap copy360WoodWorking is loading most of its new video at 1080p, but the players, when I open and hit play, show the clips at 360p. It’s amazing how much better video looks shown at the higher resolution, so I’m making the change whenever I can.

To adjust the quality, click the cog-like symbol in the lower right-hand corner to open up the choices – Real tech sounding, huh? – then select the quality you’d like to watch and sit back while the player makes the changes. As I said, it’s easy.

And if you have not yet signed up to be notified when 360WoodWorking.com goes live, head over to the address and do so. It’s getting very, very close. (That’s one less “very” than I used above.)

Build Something Great!

Glen

2 Comments

Filed under Uncategorized

Another Break-away Joint

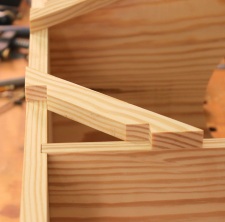
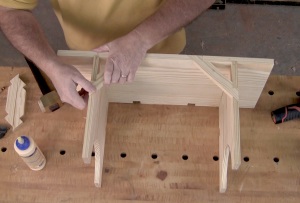
In a couple of articles I’ve written and in my DVD on a Massachusetts High Chest of Drawers, I’ve shown and described a technique used to attach drawer blades to the case using a socket that is made as you break away waste material. While working on a sample project the new 360woodworking.com website, I used that same technique – but this time, I installed corner braces on a Shaker Stool copied from a Hancock community original.Stool_1 (You can get the entire sample project off the 360 website when it goes live later this week – register at the site to get automatic notification when the site does go live.)

The technique begins by positioning the braces and transferring the profile to the top and end of the stool. The process is simple as long as you align the braces in the correct orientation. Then it’s a matter of tracing the edges of the braces using a sharp pencil (or marking knife, if you prefer).

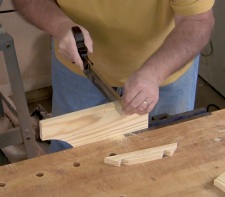
After the layout is extended down the two faces of each part, saw on the waste side of the lines to define the socket. Next, cut the waste area into small sections around an 1/8″ in width, working from end to end of the socket. Stool_3Because one end of the socket is angled and the other straight, it’s better to slightly angle your saw position as you cut – I begin on the square end of the socket, and twist my angle as I work toward the angled end, all the while maintaining the 1/8″-wide sections. Make sure to cut to the base line and not any farther. Staying short of the lines means you’ll have more paring to do to clean-up the bottom, but going beyond the lines could result in making new parts.

To break away the small sections, simply slide a chisel into the saw cut that defines one end of the socket. Stool_4That action alone should snap the sections right at the base line. I slip my chisel into the opposing end of the socket to make sure the sections are all loose. To complete the socket, pare the waste as you would a dovetail socket – be dead flat or a little sloped toward the middle of the board. With the waste removed, the braces fit in position and hold the stool square and strong.

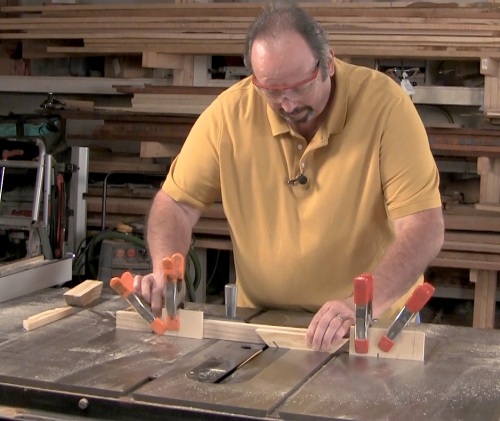
If you’re wondering how the braces were cut to shape at the beginning, that’s a nifty jig shown below. You can get the entire run down of the jig and how to set it up and use it when the 360WoodWorking site goes live. Sign up today.

Stool_Multicam_1.00_05_03_12.Still003

Build Something Great!
Glen

3 Comments

Filed under Uncategorized

360 WoodWorking Moves Forward

As most of you already know, I am joining Chuck Bender and Bob Lang in 360 WoodWorking (360woodworking.com). In the coming weeks, all my blog posts and other woodworking informational content will become part of the new website. As of this time, you can visit 360 WoodWorking and sign up for notification as to when the site goes live. In the meantime, the short video below fills in a bit more about our future plans.

Build Something Great!

Glen

3 Comments

Filed under Uncategorized

A Great Tool for the Shop

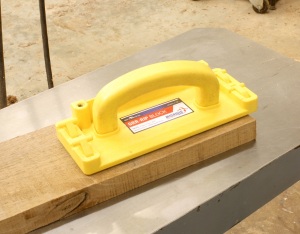
IMG_1984I don’t often write about tools I use in my shop – you see them in the background of photos taken for my posts. I have only a couple tools or machines that have immediately changed the way I woodwork. While this tool is not one of those two, it is one of only a handful that I feel should be given extra consideration. The tool, as you can see in the opening photo, is the GRR-RIP Block. (It’s from MicroJig, the same folks that make the GRR-RIPPER 3D Pushblock, which is another tool I turn to when working with small pieces.)

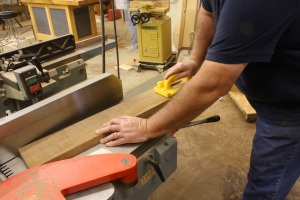
Since this newly designed push block came into the shop, it’s been at my jointer. I use it almost every time I surface material. The reason I use it is that it does the job easily. No matter how I pick up the GRR-Rip Block, it’s ready to use (unlike shop-made push blocks that are good only in one direction). IMG_1983The hooks (the company says Gravity Heel technology) are great. The two hooks on the end that ride the board easily pivot up into the tool, flat and out of the way. The two hooks on the opposite end, drop to catch the board’s end – it doesn’t matter which end of the tool is which. The handle has a slight bend to one side, which should be held out or away from the fence. But because I ride the work piece at an angle to the blades whenever I can (see the photo at right), I don’t worry about having the push block oriented every time.

I also like the GRR-RIP Block’s non-slip bottom surface. It grabs the hell out of rough stock and is just as good on smooth surfaces, if you keep the bottom clean.

If you’re looking for a push block, I’d suggest you look at the GRR-RIP Block. (I have no connection with the company other than I think its tools are innovative and extremely useful.)

Build Something Great!

Glen

2 Comments

Filed under Shop Tool

The End! & The Beginning

I think the photo below says it all.

Tweet

11 Comments

Filed under Uncategorized

What Happened at Popular Woodworking?

WoodwerksOver the last few years years, it has become obvious that the values we have for the craft of woodworking, creating and marketing content, and relations with the audience are not shared by the management of Popular Woodworking Magazine and its parent company. When you realize that the boat you’re on isn’t ever going to sail in the direction you want to go, it’s  best to get off. And, as when any relationship comes to an end, the public discussion of the details serves no purpose.

On behalf of myself, Chuck Bender and Bob Lang:

There is enough spin and speculation online regarding our departure to warrant a response. To clarify, we resigned our positions as a team and going forward we will be working  as a team – together. Our decision to leave was not a hasty one, it came after a year and a half of discussing our concerns regarding the brand’s editorial direction and marketing policies with management at all levels of the company. The “restructuring” occurred several months ago, after the departure of Kevin Ireland. While that was a factor, it was not the sole cause.

We have been invited to submit contributions in the future, but none of us has accepted that invitation.

We want to thank each and every one of our readers who have taken the time to express their appreciation for our work. We have decided to move on, and we hope that those who enjoy our work will find the next phase of our careers as interesting and exciting as we do.

We can be found online at 360woodworking.com , and when you visit the site, you’ll have a front row seat as our plans unfold.”

Build Something Great!

Glen

17 Comments

Filed under Uncategorized

Best Tool for the Job

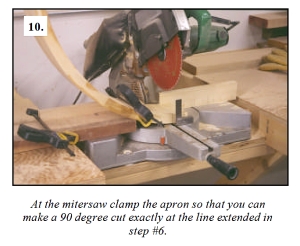
Something that I preach is that we woodworkers should use the best tool for the job. It that’s a table saw, jointer or big-honkin router, so be it. It the best tool is a handplane, egg-beater drill or sharp chisel, go for it. Mitersaw_cutTo be wholly dedicated to one woodworking discipline while ruling out others is nuts.

The story I like to tell is a tale on myself. When I built the Baltimore Card Table article for Popular Woodworking Magazine, I was more dedicated to power tools even though I used hand tools. In one of the early steps of the build, I needed to trim the ends of the brick-laid apron. I spent 20 minutes or more setting up the cut at my miter saw. Of course, the cut was square and right. (See the image from the article above.)

Years later, after hand tools began to play a bigger role in my day-to-day woodworking, I taught how to build that table at a woodworking school. When the time came to trim the apron, I grabbed my pencil and square, laid in the lines then made the cut using a hand saw. Of course, the cut was square and right. The difference was that I did not spend 20 minutes setting up the cut.

What’s important is to choose and use the best tool for the job.

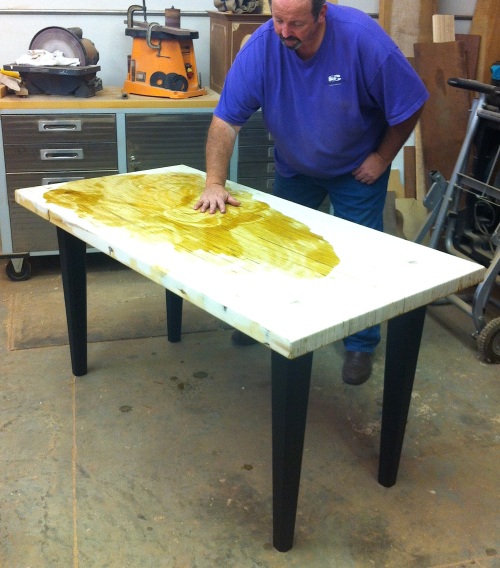
In the photo below, I guess the tool would be classified as a hand tool. I  know, however, that it is the best tool for the job. Why? No only does this tool make spreading the oil/varnish mix quick to accomplish and easier to direct finish were it’s needed, the process also warms the oil ever so slightly to better allow mixture to soak into the surface.

OV_LVL_1

Build Something Great!

Glen

8 Comments

Filed under Finish Techniques, Methods of Work, Shop Tips, Shop Tool

Always Something to Learn

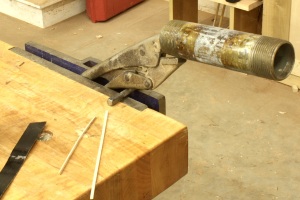
IMG_1944In woodworking, one of the most satisfying things is that you never know it all. Everyday there is something knew to learn. That’s one of the things that keeps me looking and listening and trying new ideas. In the left-hand photo, you see how I’ve set up to bend stringing since I first began working with the material. I grabbed a length of pipe in Vise-grips, clamped it into my bench vise, heated the pipe and bent the stringing over the pipe using a metal-strap backer. If you look close, you see a nail set slipped between the grips and vise. I sometimes found that downward pressure as the bend was taking place could cause the setup to move in the vise, and that’s not a good thing to have happen. The nail set stopped that.

As I’ve demonstrated this technique to different woodworking groups, I’ve had occasion to see a few interesting string-bending setups, including  a massive three-pipe selection that bolted to a workbench and allowed a constant flame to keep the pipe at the correct temperature for bending – whatever that is. I’ve also been asked so many times about using a heating iron as does Steve Latta; sorry Steve, that’s way too slow.

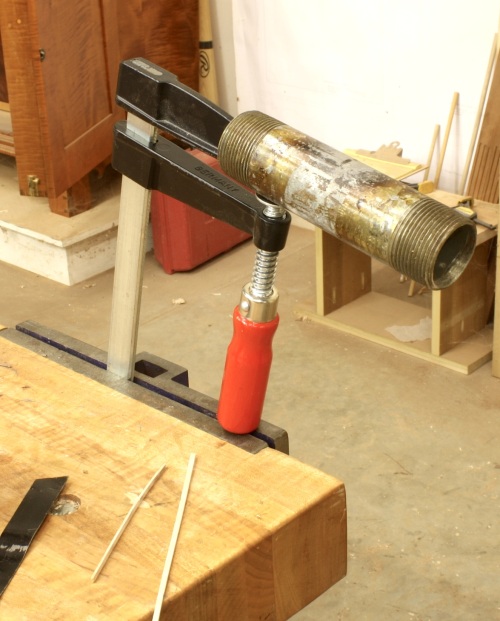
I did, however, learn a new setup while teaching my session at Woodworking in America this past weekend (the reason there was no post on this blog last Sunday). I traveled to Winston-Salem, N.C. without my Vise-grips and nail set. When it came time to demonstrate the technique, I was at a loss. Until, that is, I grabbed the F-style clamp I tossed in the conglomerate of stuff I’d taken along. With the length of pipe secure in the clamp, I set it into the bench vise with the handle resting against the top of the vise. No amount of downward force would cause the setup to move. And as long as you remove any plastic fittings from the clamp, heat from my torch was not a worry. It worked great.

IMG_1943There’s always something new to learn in woodworking.

Build Something Great!

Glen

3 Comments

Filed under Back to Basics, Inlay, Jigs, Methods of Work, Shop Tips

Table Legs & Terrific Technique

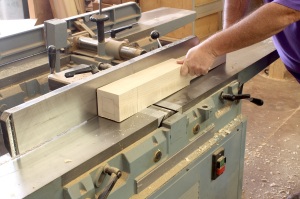
IMG_1883The LVL desk build continued with the legs. I milled 8/4 material, then joined two pieces to form four 3-1/2″-square legs. Square wouldn’t do, so we decided to taper the 28″ lengths over 24-1/2″, leaving a bit of square at the top. Tapering legs is best done at a jointer, if you ask me. As long as you hit your layout lines, you can nail each leg so that they are all tapered exactly. It took only minutes to taper all 16 sides.

Still, the legs didn’t have the right look, so we decided to chamfer the corners. But how do you stop the chamfer at the perfect location? You don’t. We trimmed the corners along the legs entire length; that left the square portion at the top end tapering out of the cut made at the router table.
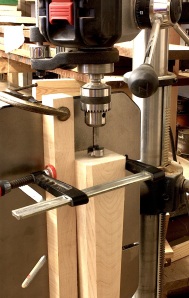
IMG_1885To join the legs to the top, we went with a simple idea – dowels. If we would thought of this at the beginning, we could have drilled the leg ends while the blanks were still square. But, of course, we didn’t, so the set-up was a bit more involved. I rotated the table on my drill press, clamped a straightedge in position then centered the 1-1/4″-diameter bit in the leg, which was clamped to the straightedge. (Told you it was more involved.) Holes were drilled about 1-1/2″ deep because the arm of the press came down onto the rotated table to stop the cut. That wasn’t enough of a hole in my opinion. Afterward, each hole was set another 1-1/2″ in depth, and dowels were glued in.

For each leg to fit tight and flush with the bottom surface of the tabletop, it was imperative that the 1-1/4″-diameter holes drilled through the top be square to the large flat surface. IMG_1892There’s no better tool than a router for this work. I don’t, however, have a router bit that diameter, so there was no way to plunge the holes as you would when knocking out adjustable shelf pins. The next idea worked perfectly. drill through the top in the correct location using a smaller diameter drill bit (in this case I used 3/4″), then enlarge the hole using a top-mount pattern bit. All that’s needed is a scrap piece of plywood with a hole drilled exactly to size; that’s easy with the drill bit already in the press.
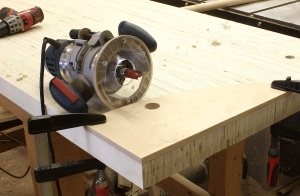
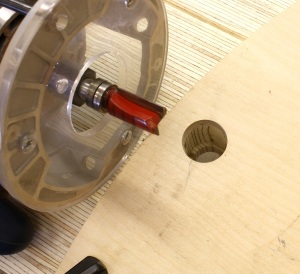
IMG_1891To use the jig, clamp the plywood piece in position on the table’s top over the previously drilled hole, slip the router setup into the hole with the bit’s bearing riding along the plywood cutout and rout a perfect matching-size hole in the top. To get through the entire 2″ of top, we had to remove the plywood and repeat the steps using the trimmed portion of the hole as a guide. Easy, peasy!
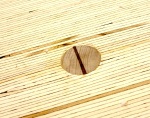
IMG_1897With the holes drilled and the dowels sawn for wedges, we slipped the legs into the top, spilled a little glue into the sliced dowel then drove walnut wedges to bring everything tight. The final look with the dowels and wedges trimmed look good. Plus, there’s no wobble in the table, especially after the glue dried.

Build Something Great!

Glen
Leave a comment

Filed under Design, Desk Build, Jigs, Joinery, Methods of Work, Shop Tips