Monthly Archives: June 2013

Shop Tips (or We All Make Mistakes)

IMG_1084A few weeks ago, I posted about drawing full-size plans (here’s a link if you need to catch up). As I wrote then, I seldom spend the time to make full-size drawings of a project, but the Egerton tall clock is one of those times I think it’s important.

Yesterday I worked on the hood door. The design, as it is on many clocks, has two stiles and a lower rail that are straight. The upper or top rail is arched to follow the design of the dial. The door for the Egerton clock has a small molded edge on the inside. Because I’m using traditional joinery – mortises and tenons – I have to assemble the door parts with mitered sticking. There are quite a few extra steps on your parts if you’re working this way. Add to that the rabbeted area for the door glass and there’s a lot on your plate. That’s why I took the time to draw it full-size.

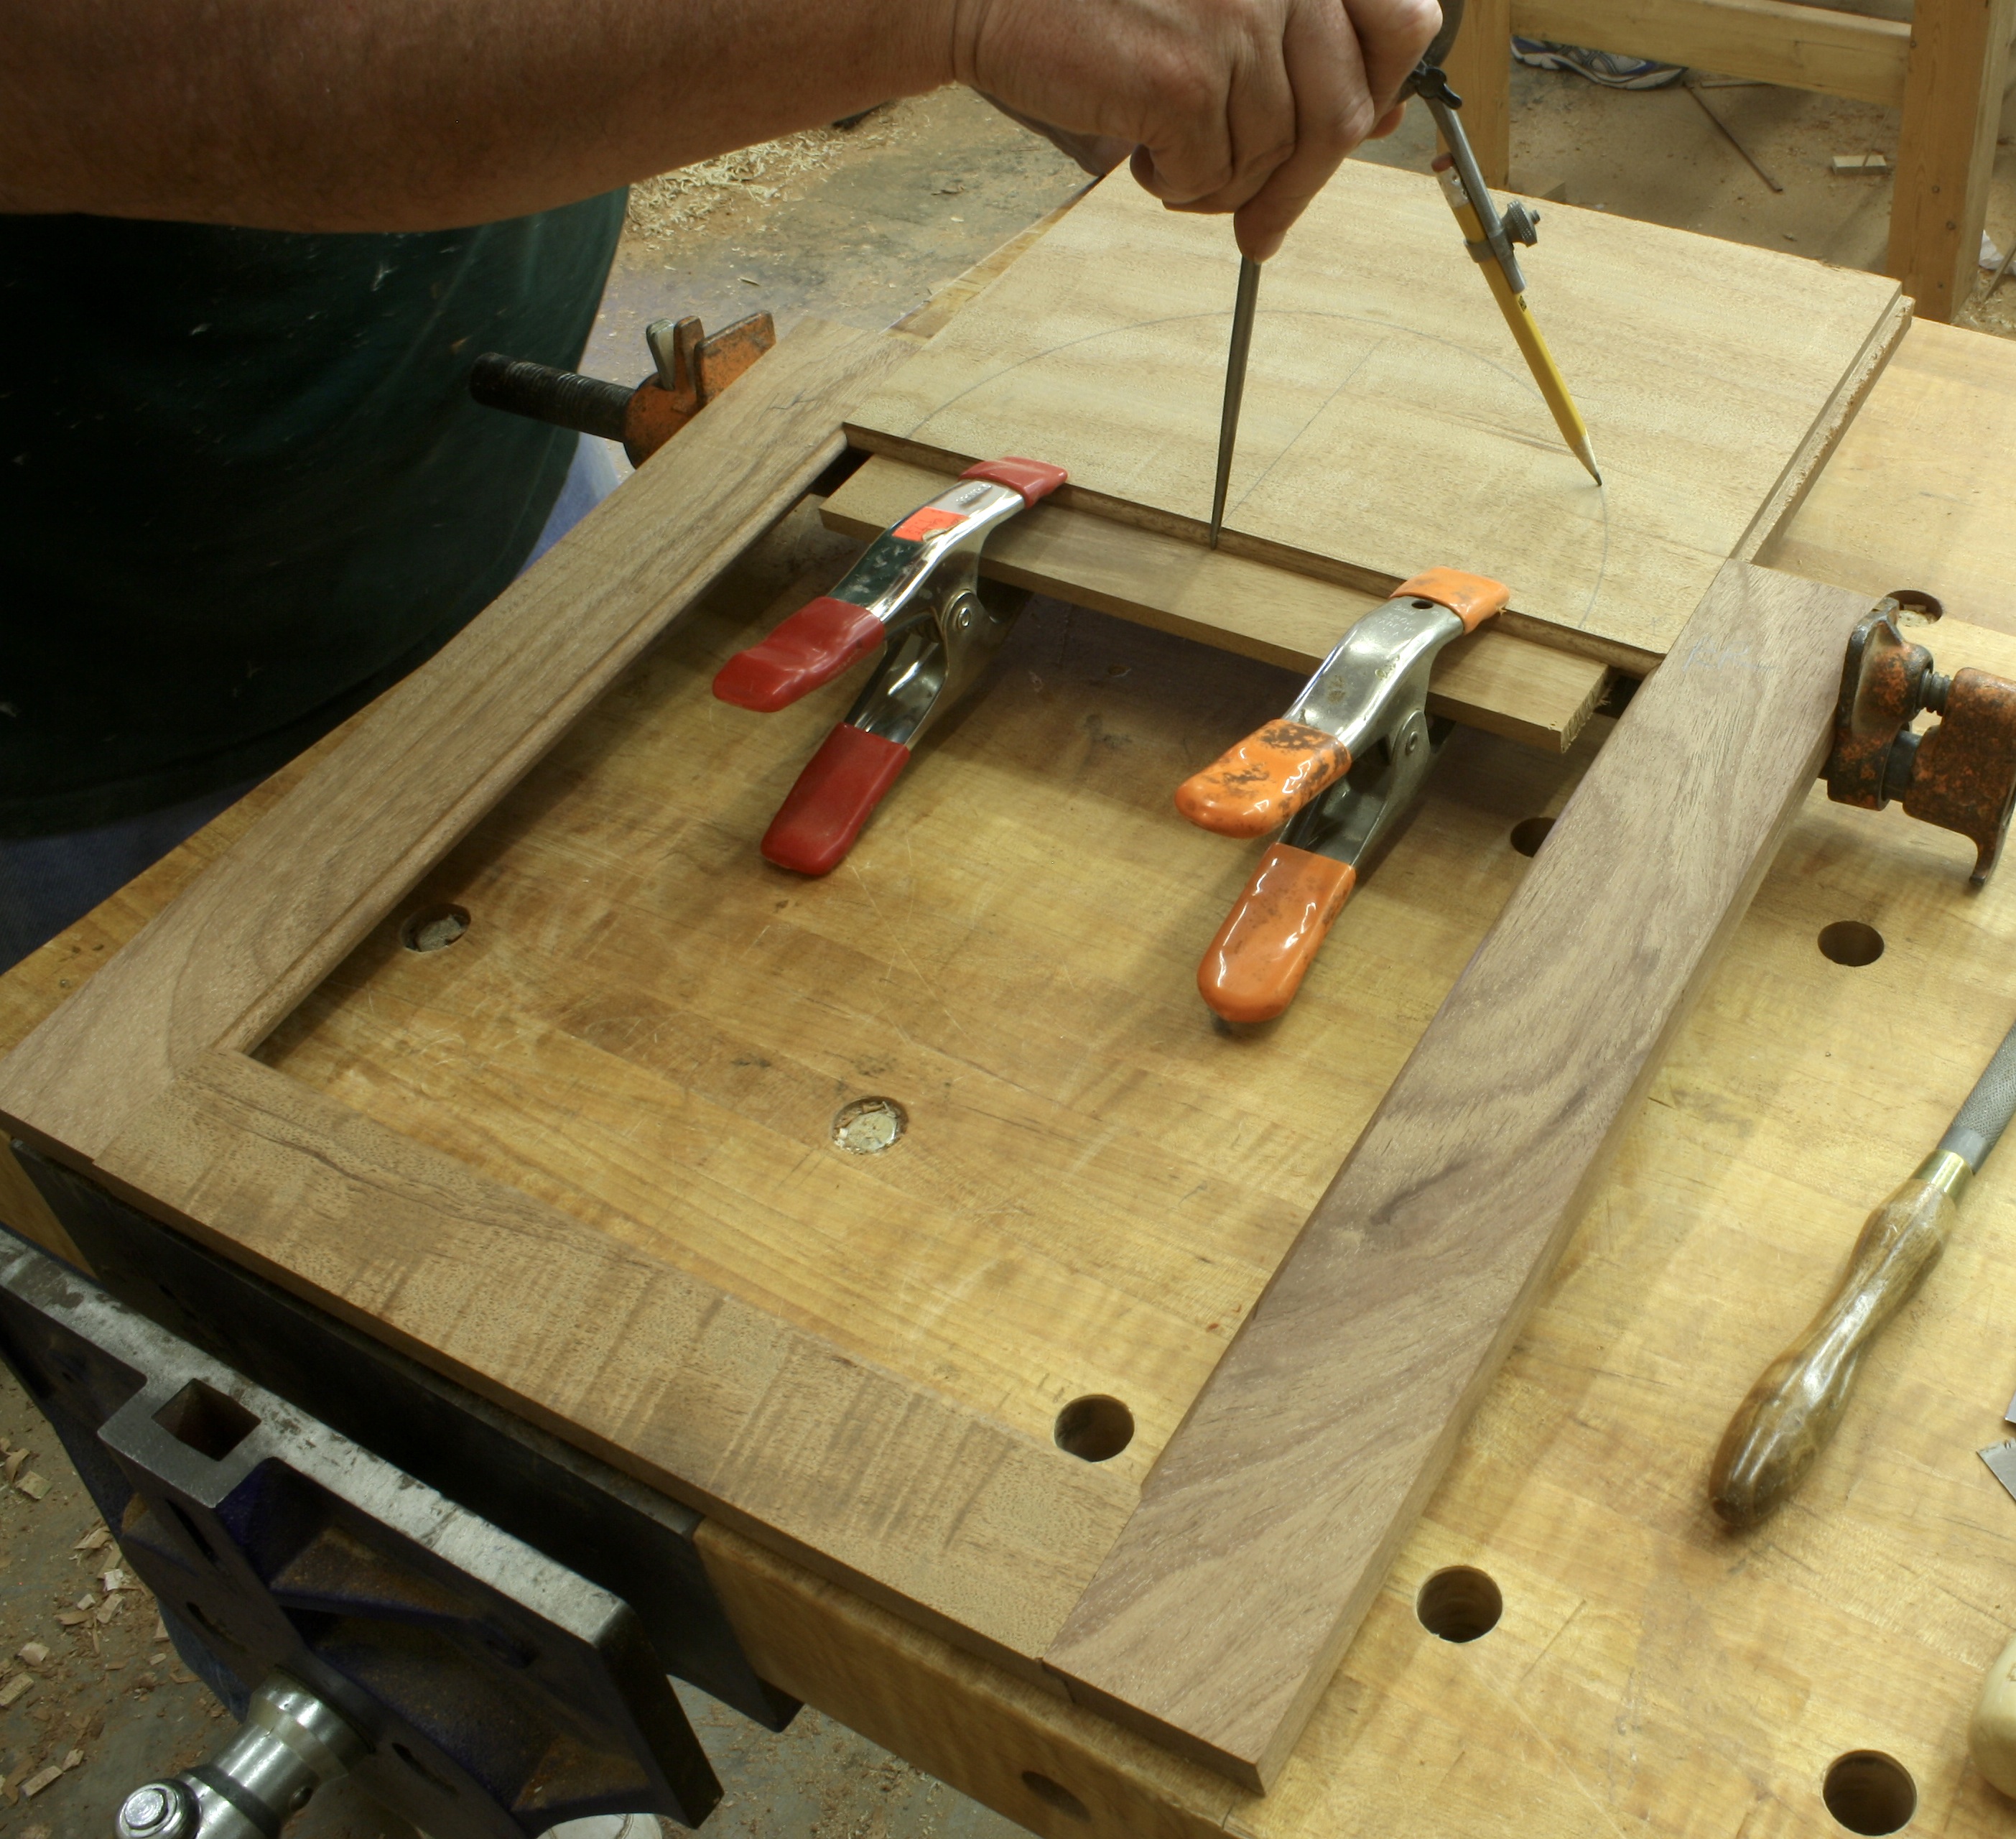
As you can see in the opening photo, I got the joinery complete and had my door frame assembled. I located the top rail center then with my compass in hand, I marked the interior arch. IMG_1085That arch needs to be cut out, the inside edge is molded to match the rest of the frame and it’s rabbeted, too. Before I did that work, and while I had the door parts assembled, I reset my compass and drew in the outside arch. That’s when I knew I had a problem.

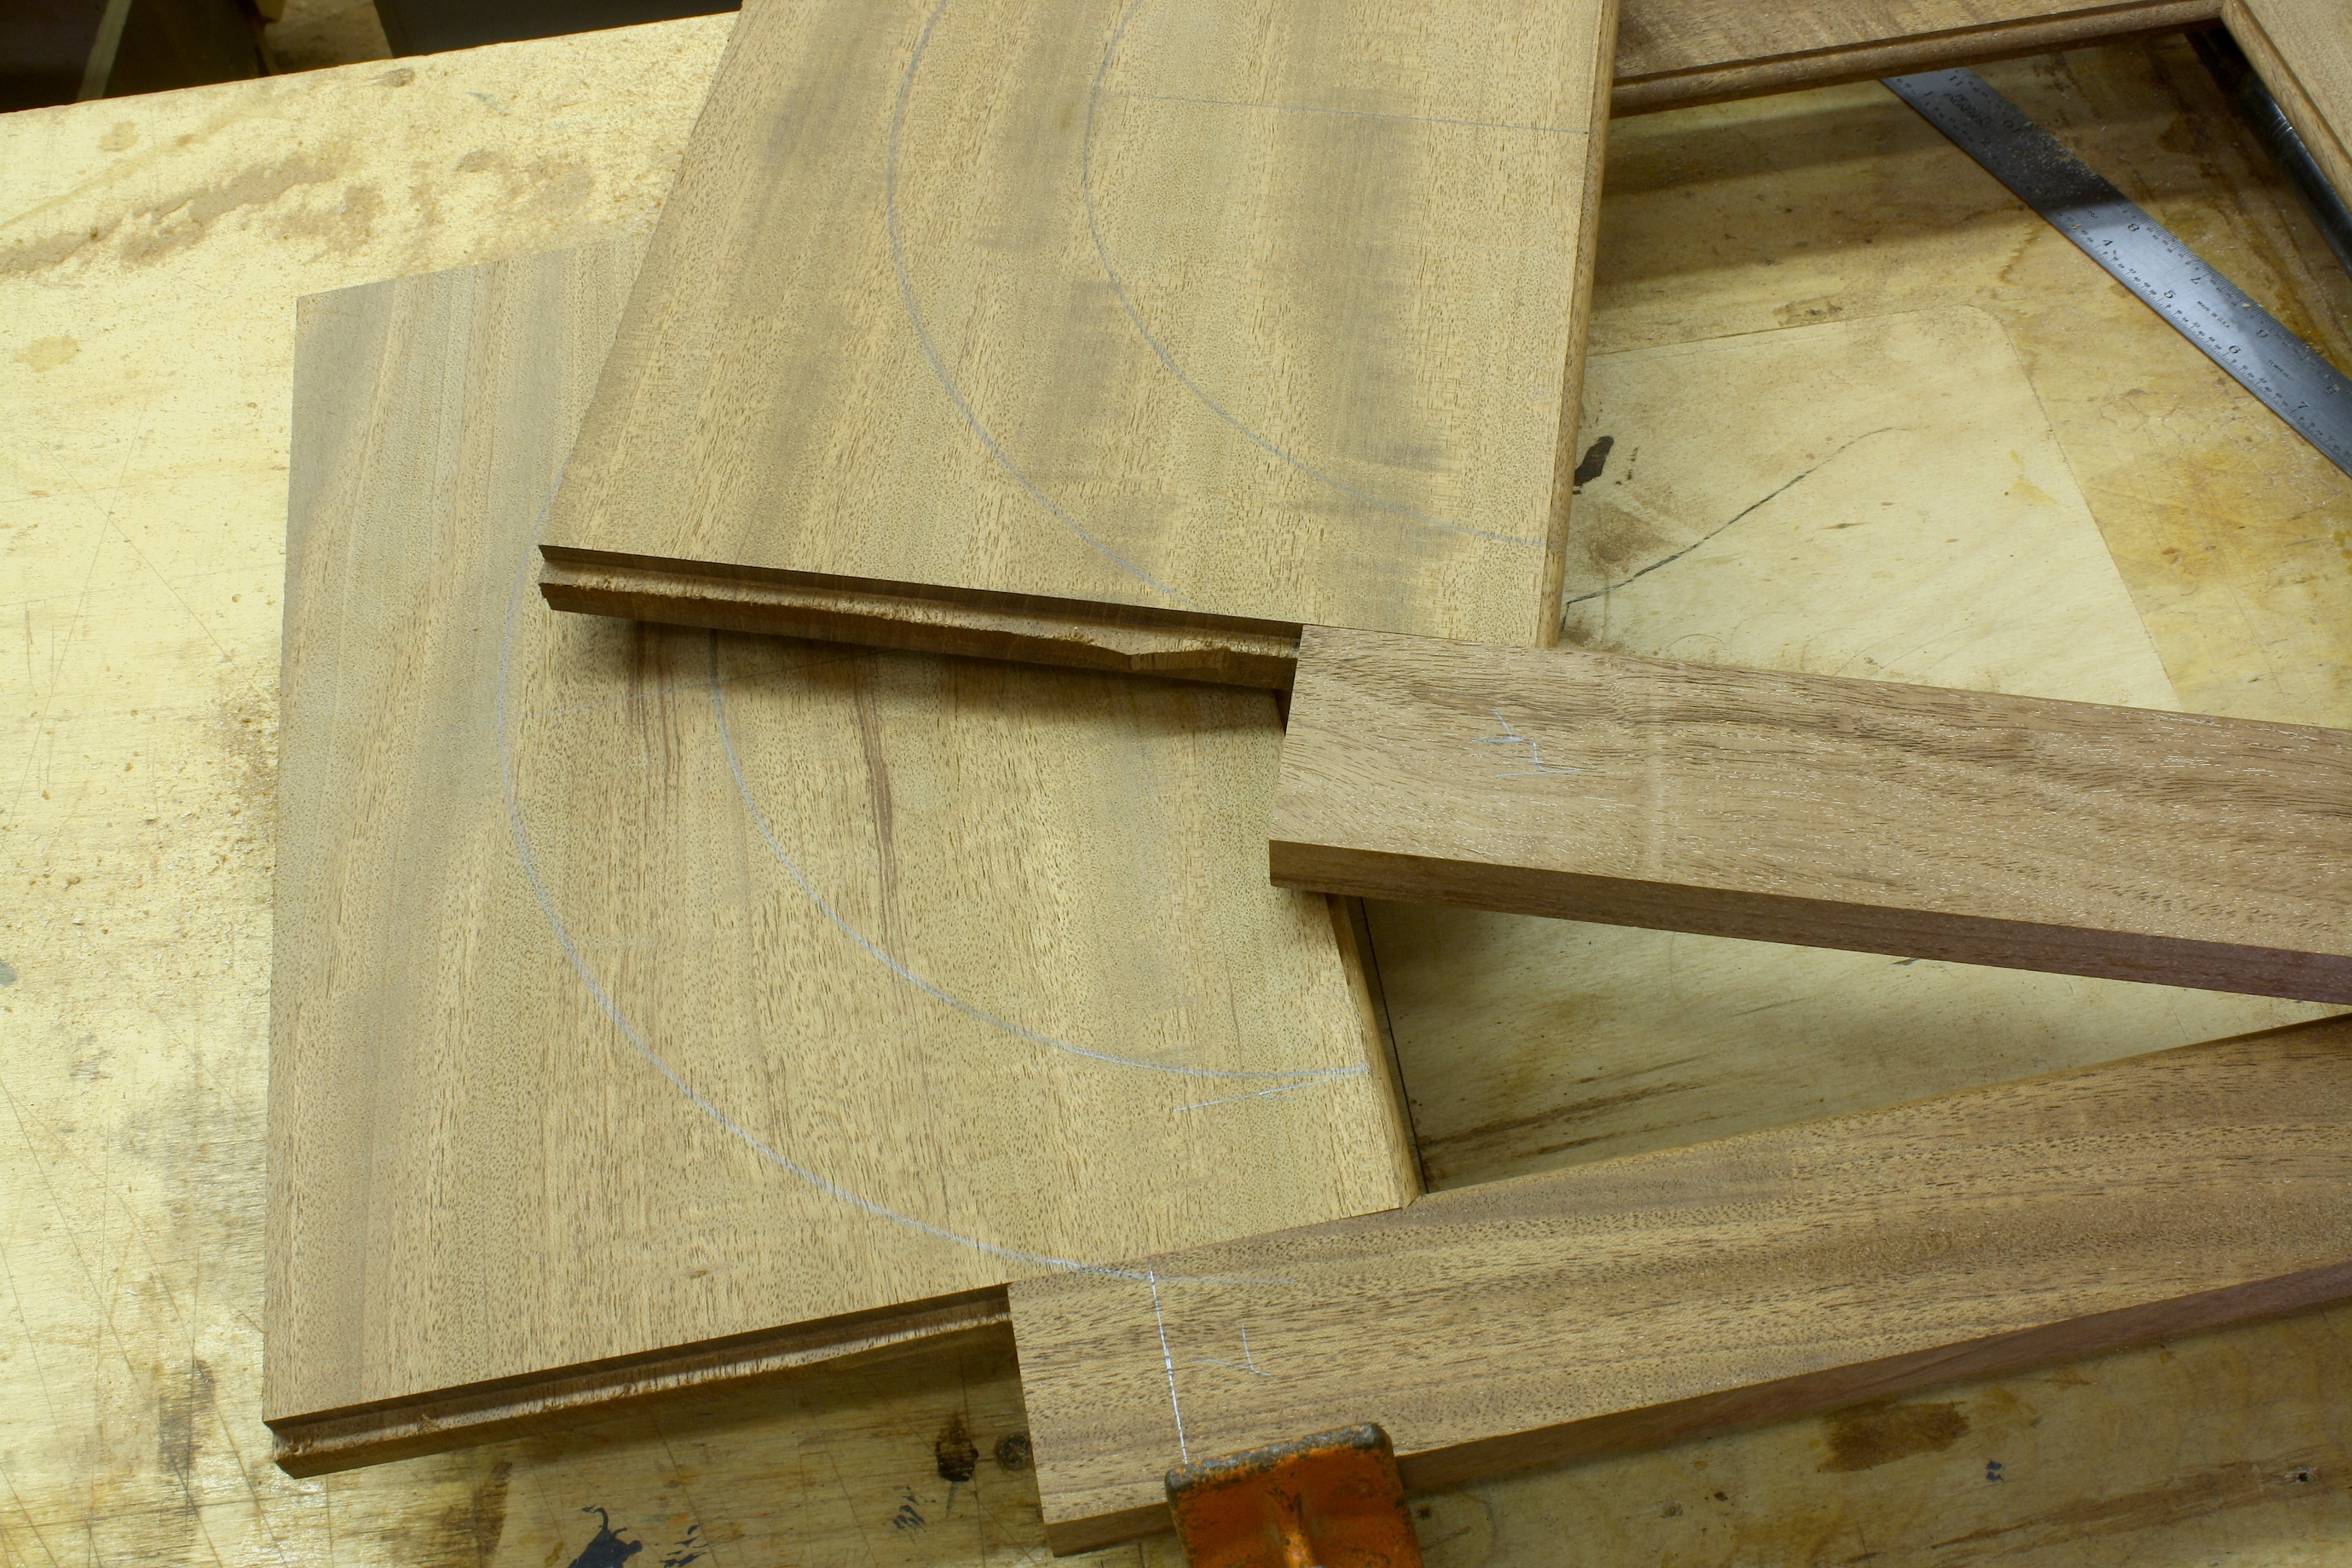
If you look at the right-hand photo, you can see my problem. (The pencil lines are a bit hard to see, but if click on the photo the image get bigger.) The outer arch hit in no man’s land. My stiles were not long enough. After 15 minutes of self cursing and trying to figure out a way correct the problem, I did exactly what should have been done. Make new stiles.

New stiles meant that I had to re-create the entire setup again. Shop tip #1 is to leave your tools setup until you’ve completed the work. IMG_1088My router was not changed, so I easily routed the profile onto my new pieces. Also, my mortiser was not changed making those cuts a breeze. Everything else had to be re-set. Sucks for me.

Part of my 15 minutes was spent trying to decide why I had missed this minute-but-huge point as I studied my full-size plans – that’s why you draw them, right. That is Shop tip #2. Study the plans. I had the information right in front of me, but didn’t pay attention. In the left-hand photo, you can see that I should have picked up the small detail. In fact, the line drawn that extends from the inside edge of the door stile to the arch above was not drawn in. Bad move. It was only afterward that I penciled in the line.Lesson learned.

IMG_1086

As you can see in the photo below, I finished the new stiles and now my arch hits into wood instead of open air. I lost about 1 1/2 hours of time, but as it is when we screw up in the shop, I learned a valuable lesson. Mistakes make us better woodworkers. I just hope I remember it the next time.

Build Something Great!

Glen

1 Comment

Filed under Shop Tips, Tall Clock

Punching the Scroll

IMG_1076In April this past year I first wrote about the perforated or punched scroll-board on the Egerton tall clock (read about here). Since then I’ve been working on the details, trying to get patterns complete and finally decide how I plan to go about the work.

This weekend I began experimenting with a couple of different materials to see if one would be better than the other – I have yet to decide if this is the actual process I plan to use to punch my scroll. IMG_1077The first material was a scrap of the backed veneer I used for the clock’s door and base front (click here if you want to take another look).

I placed half of a paper pattern of the scroll onto my scrap and went to work. Each small cutout requires eight stabs, four using a carving gouge and four with my 1/8″ chisel. In the backed veneer, I needed a bit of force to push through. After a number of holes were punched, I took a look at the cutout area and decided this would work. The problem I have withthis material is that the veneer is crotch mahogany. Being crotch, the grain pattern is somewhat wrong for the scroll-board. In the original, the grain pattern is more straight, and it runs at an angle that directs your eye toward the top of the clock – one of the woodworking rules to which I like to adhere.

IMG_1079In order to use a piece of straighter-grained veneer, I had to turn to a paper-back veneer. First I had to see if it works; my primary concern is that the veneer, along the thin connector lines between the cutouts, splits and cracks. My second concern is using a paper-back veneer. I cut a piece of of material, laid the paper pattern on top and again went to work.

After working for about 30 minutes – yes, the work went quicker than I expected due to the material being thinner and because I developed a better routine – I peeled off the tape to take a look. You can see the results below.

IMG_1080

I like the look and either material seems to work out, but I think I’ll pass on the paper-back veneer. This week I’ll make some pieces of shop-cut veneer just so I can get the grain right. And to provide support for those small connectors, I’ll add a cross-grain backer. I expect that the work will be more difficult due to the thicker veneer, but I’ll stay more true to the original and the look should be right-on.

Build Something Great!

Glen

1 Comment

Filed under Hand Tools, Shop Tips, Tall Clock, Veneer

Happy Father’s Day

It’s Sunday, the day of the week that I post a blog. It’s also Father’s Day. How could I not combine the two.

IMG_0021I lost my Dad five years and 15 days ago. I lost my Mom on April 11 of this year. For the past two months I have been dealing with breaking down a house that holds many memories – I house that I helped build from the foundation up. You see, I worked in construction and then furniture making with my Dad. For the last 20 years of his life, we worked together in one way or another. That’s just another way to say that I have many, many memories.

My Dad was more than a Father. We were friends. We traveled the roads selling furniture at shows from Chicago to Connecticut and from Cincinnati to Virginia. We had many hours driving, talking and laughing. One of my funniest memories of Dad was while driving in the New York city area when I car cut us off causing me to swerve the truck and trailer full of our furniture. As things settled down and we moved beside the reckless driver, my 70-something-year-old Dad purposefully extended his middle finger at the other car. We laughed for miles. I’m a lot like Dad when I’m on the road.

One of the ways that I am not like my Dad is in how he “got” things. Dad could pick up a book, read about any topic and get exactly how to do whatever it was that he read. That’s one of many traits of his that I admired. (I, on the other hand, am a woodworker. I’m visual. I have to see it happen before I really get it.)

When Dad decided to build his first house, he picked up a book on how to do the wiring and went about the work. It took him a few inspections, but his job passed. Our family lived in that house for a few years before he built another home. He did the same when he began woodworking. Books were read, tools were bought and a new hobby was started. (My brother and I argued about who would get his first piece – a cherry lowboy – when my parents were gone. The photo above is that lowboy – and it sits in my house.) Dad could do almost anything.

PerrierWhen I talk to woodworking groups on my first visit, I tell them a story about my Dad and how important it is to get your kids or grandkids involved in this hobby, or any hobby. The story goes like this: One thing that Dad couldn’t do really well was correctly pronounce words that he read. For example, when water was first sold in bottles, one of the first to market was Perrier. Dad would call it Pierre. (This is a bit more difficult when writing versus speaking.) He pronounced taco, as in Taco Bell, with a long, drawn-out a. He was only off a bit, but it was a noticeable bit.

As a 13 year old shadowing my Dad’s every move, I also began woodworking. I liked what he liked. I did what he did. I pronounced words as he had told them to me. (That was a mistake.) We went to Washington Court House Ohio to a lumber mill – Willis Lumber, if you know the area – to buy lumber for a lowboy and a Shearton Field Bed that I wanted to turn. (I had already turned a dozen bowls at the lathe – obviously I had mastered turning so I moved on to a bigger challenge, and Dad was happy to indulge my fantasy.) After you picked your material at Willis Lumber, you went upstairs and asked to have your selections measured so you could pay. Dad went upstairs and I stayed behind to make sure everything we picked was measured.

As the guy measured our lumber, he asked what we planned to build with all the 12/4 cherry and 12/4 mahogany. I pumped out my chest and said that I was building a bed with the mahogany and that Dad was making caribou legs for his lowboy. (Dad told me they were caribou legs – as I said, big mistake!) A huge grin washed over the lumber guy’s face. It wasn’t until later that we found out that these legs were called cabriole, not caribou. I can only imagine how many laughs we brought to the lumber dealer employees.

From John Kiesewetter's blog at cincinnati.com

From John Kiesewetter’s blog at cincinnati.com

What I don’t have to imagine is how much fun and how many laughs this episode brought to Dad and me. We talked of it often. Years later we had a weatherman in Cincinnati named Ira Joe Fisher who, in the winter months, loved to give the temperature in Caribou, Maine. Each morning while drinking a cup of coffee before heading out to work, Mr. Fisher reported the thermometer readings for Caribou, Maine, and Dad and I would smile at each other. We had something between us that few others knew about. Woodworking gave us a connection that to this day makes my eyes well up when I think of it. This is why it’s important to get your family involved in your hobby. You never know when lifelong memories are made.

And if this is too much information for you, imagine my middle finger being extended. As I said, I’m a lot like my Dad.

Happy Father’s Day and …

Build Something Great!

Glen

5 Comments

Filed under Uncategorized

Two of My Top Ten Gripes

Woodworking is a great way to make a living. There are, however, problems with even this career. This week I’m posting two of my current top ten gripes.

Bump-cutNumber one on my list – this specific gripe stays at number one or number two throughout most of the year – is the safety police. If this is you, please know that it is not your job to constantly point out things that you consider too dangerous. The fact that I don’t have on safety glasses and ear protection as I work at my table saw or run a router is not the end of the world. These particular violations have been pointed out so often that we all know the rules. If you feel you need to wear glasses every time you step into your shop, then do so.

Number two this week are those that hear someone state a woodworking rule, but do not hear or understand the exact meaning of that stated rule. Case in point: Don’t use your table saw fence in conjunction with your miter gauge, and never glue cross grain.

This past week I posted on the Popular Woodworking Magazine (PWM) blog about bump-cut tenons. This technique has been used for years and years – someone commented that they had seen Norm Abram use this on New Yankee Workshop. The rule that should be followed is that you should not use your table saw fence in conjunction with your miter gauge IF YOU ARE MAKING A THROUGH CUT. That last portion of the sentence is the real message. If you’re not cutting through, use your fence and miter gauge as you see fit.

Another rule is that if you glue cross grain your board will split. I ran into this problem way back in another post on the PWM blog dealing with case sides in lowboys. It has also surfaced when working on the returns around slant-lid desk lids. Both can and often were glued fully.

IMG_1060Take a look at the this photo. What you see is a torn-apart bookcase side that I assembled in 1977 or 1978. (It was a bookcase for a high school sweetheart who broke up with me before I finished the top section.) These boards have been stored in a stone-walled basement of an old farmhouse, been moved from house to house in six moves and have been stored in my garage for the last 20 years. This week I went to re-purpose the wood to knock out a couple small drawers. I tried to knock off the blocks with my hammer, then tried to hook the claw of said hammer under a corner to split the pieces apart. No luck. Finally I drove a screwdriver between the two pieces and the split was made.

In the photo you can see that the regular yellow glue did not fail. What failed was the wood. While this glue-up was across only about 8″, I think it shows that it’s possible to glue in this manner and there are certain circumstances when it is OK to do so. You just need to know the rule – the exact rule – and when you can bend it. (I always glue the first 4″ to 6″ of moldings I use on my projects.)

Please don’t blindly follow what you hear or read.

Build Something Great!

Glen

11 Comments

Filed under Back to Basics, Shop Tips

Scroll Pediments: On Clocks Anything Goes

High ChestScroll pediments are the front panels found at the top of some of the most impressive pieces built in the 18th- and early 19th-centuries. Furniture such as  Bonnet-top high chests of drawer or highboys (as shown in the left-hand photo), bonnet-top chest on chests and many period clocks have scroll pediments. It’s on these panels that gooseneck mouldings are applied. Scroll pediments, at least on the highboys and other chests that I have seen in books and museums, have the grain running from side to side. (Most scroll pediments attach to the pediment returns with dovetails.) The same holds true for many clocks. But that is not always the case.

Tall case clocks are different when it comes to how they were built in the late 1700s and early 1800s. On tall case clocks, you can find many construction techniques that leave a 21st-century woodworker scratching heads. Some period clocks – some very expensive period clocks – appear to be held together with little more than chewing gum and grime collected throughout the years.

#5024-03I have pointed out a few of the let’s say questionable construction techniques I’ve found on the Egerton clock that I’m working on. The scroll pediment is just another example. On the original clock, which at one time was for sale at $120,000, the grain of the pediment runs vertically. I know this because I have a photo of the back of the hood.

IMG_1058As I work on my tall clock, I am changing many of the oddities I found with the original, but as always the case, a few of those questionable construction techniques are being repeated. Case in point is the scroll pediment. I decided to keep the grain direction vertical. How this changes the building of my clock is most apparent as you work on the pediment returns. Dovetails, which are found on many of the period clocks that have broken-arch pediments, are not an option because the grain on the returns runs perpendicular to the scroll pediment. As a result, I attached the pediment and the returns with screws. I expect that nails were used on the original, but I went with screws (tightly fitted at the bottom and in over-sized holes at the middle and top for seasonal movement) for a more secure hold.

High_Res ScrollWhat is extremely interesting to me is that if you look at the front of the original Egerton clock you could not know that the scroll pediment grain runs vertically. You would, in fact, guess that the grain runs at a 45-degree angle because that’s the look presented at the front. A veneered face with fancy cutouts fronts the pediment.  The veneer grain is angled. (That’s a detail that I will add to my build.)

Build Something Great!

Glen


1 Comment

Filed under Antique Pieces, Design, Joinery, Tall Clock