The past two Sundays (the day I regularly post) I was either on my way to the Connecticut Valley School of Woodworking, or on my way to New York city for a day at the Metropolitan Museum. Today I’m sharing photos of the class. In coming posts, I’ll share photos from the Met and from the Connecticut Historical Society – where we first discovered the class project (read more about that here).

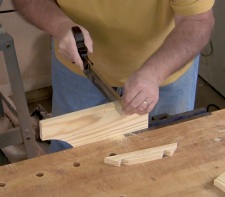
Class began with a brief discussion of how to pull leg patterns from photos using SketchUp, then the class made patterns and began their legs.  After layout, everyone took turns at the band saws so they were immediately plunged into leg work. In expectation of the legs taking two days to wrap up, head schoolmaster Bob Van Dyke arranged a trip to the Connecticut Historical Society (CHS) for Tuesday afternoon. (If you haven’t had the opportunity to visit CHS, do yourself a favor and do so. The staff is first rate and CHS is very reproduction-craftsman friendly.) If you plan to build this lowboy from the article in Popular Woodworking Magazine (February 2014, #209), I suggest that you take an extra 1/8″ off the leg pattern before you begin. When I saw the original lowboy at CHS for the second time, I realized that the legs on the antique lowboy were much finer, giving it a lightness that I missed while sizing from the many photos I had.
 After the legs were shaped so far, a trip to the lathe was in order. Turning the feet and pad took a long time for the class – seven class members was 28 individual feet to turn. Everyone survived without problems, Right Jon? Here you can see Janice using pair of outside calipers to bring the foot to diameter. In all we used two caliper setups and only four or five basic turning tools. And it was nice to have a variable-speed lathe to work on; there’s a lot of wobble when you first turn the leg to shape the foot.
 From the lathe the next step was to mortise the legs for the aprons, back and ends. While this work can be done while the leg is still as a blank, I think it’s better to actually see what the leg looks like before making a call as to where it will fit. After the legs are shaped, you can easily see which legs look best – those go to the front, while others move to the back. We had two mortisers setup and working, plus I demonstrated how to use a plunge router to do the work. Of the seven taking the class, only one used a plunge router for his mortises. (It’s great during classes to use tools you don’t have in your shop, as long as you know how to do the work when you’re at home.) One additional hint is to make sure that you’re cutting to the necessary depth – a couple of woodworkers had to make a return trip to the mortiser. Sorry I didn’t catch that sooner Mike.
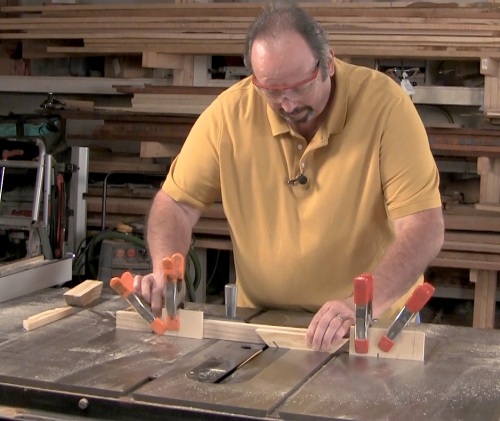
 By Wednesday everyone had knocked out the remaining outside case pieces and the lowboys were beginning to take shape. Jon spent extra time on his legs – he also noticed the finer look of the lowboy at CHS. After cutting the designs for the ends and front apron, we worked on bending the cock bead. I was happy that the bends for the longer end-panel beads went so well. Most everyone got those pieces bent using a soaked piece of wood and a heat guy set on high – if you take your time, you can feel the wood give up as it melts into position. If you apply the heat for a bit longer, you actually set the bend just as if you left a steamed piece in the mold until it dried. Smaller, tighter pieces were made using a router with a specifically paired guide bushing and router bit. (Read the article to learn the setup.)
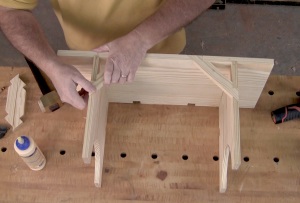
 Work on the inside of the lowboy went smooth, aside from the occasional misplaced screw pocket. There were a couple of hand-cut dovetail sockets that needed attention, but overall the class breezed through the interiors. As the cases were coming along, the lowboy tops came into focus. A little router work was all that was needed. It took, however, two passes around the top to get the profile complete. And with this project, the profile continued on all four edges; I checked the original lowboy to make sure. Many tops from the period are molded only on three edges.
 Late of Friday and most of Saturday, drawers were the topic at hand. Of the seven in the class, three decided to build the drawers with the slanted sides and back – a challenging task even if you’re experienced in dovetail work. As you may have guessed from the opening photo, not all the drawers were completed during the class. As it is with many classes, there is homework. Also, most of the class members decided not to glue up their lowboys. Flat-packing the pieces home is much easier than trying to cram a lowboy into the back seat.
The class went great. I worked with a lot of talented woodworkers. I’m amazed at how good many of the folks are who take classes. If they had more time in the shop, their work could easily rival many of the top woodworkers in the country. Take a class. It’s fun and it’s sure to improve your woodworking.
Build Something Great!
Glen
 If you have not yet heard, we, Bob Lang, Chuck Bender and I, have opened the doors on our new site.


 After layout, everyone took turns at the band saws so they were immediately plunged into leg work. In expectation of the legs taking two days to wrap up, head schoolmaster Bob Van Dyke arranged a trip to the Connecticut Historical Society (CHS) for Tuesday afternoon. (If you haven’t had the opportunity to visit CHS, do yourself a favor and do so. The staff is first rate and CHS is very reproduction-craftsman friendly.) If you plan to build this lowboy from the article in


