
Last week, after I professed that everyone should have a spindle sander, A few readers asked how I used a spindle sander as a thickness sander. It turns out that I have posted that technique, but it was inside another post. Here’s a link to that post; you’ll find the spindle sander being used to thin ebony string about halfway down the post.
 On to the next topic: How to attach feet to your case. Of course, there are a few ways to get feet on your cases. There are three methods I generally use on most every case. The first is to attach the feet directly to the bottom of the case, a second method is to rout the top edge of the joined feet and install a plate through which screws affix the assembled unit to the case bottom and the third method is to attach feet to a frame then attach the frame to the case and use a transition molding to cover the through dovetails where the case bottom joins the sides. I mention other methods, because I’ve built a couple of chest – full-size and spice boxes – from Chester County where the feet were attached directly to stiles of the frame and panels sides. While this is not commonplace, it, along with other methods, is sometimes done.
To attach feet directly to the case, I begin by installing a molding to which the feet are glued. You wouldn’t think that you could assemble feet to a molding and that would be strong enough to hold everything for 200 years. 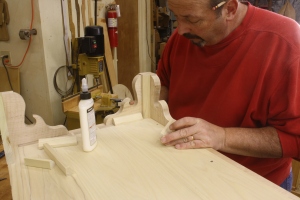 Of course, you would be correct. What really holds the feet to the case are glue blocks. These blocks also carry the bulk of the load of your chest. On the case I’m currently at work on, the thickness of the feet allows about an 1/8″ of the feet to lap onto the case itself. Then, with the glue blocks in place, the weight of the case is divided on the actual feet and on the glue blocks – the vertical block holds the weigh while the two horizontal blocks keep the assembled foot attached.
The next method is a bit more work. And the added plate makes the connection easier, but not necessarily any stronger. After the two foot pieces are joined via miters, I rout a small lip on the inside of the feet using a rabbeting router bit to which I attach a thin plate. 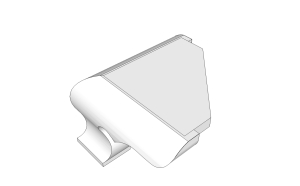 The SketchUp drawing at the left shows how the plate fits to the feet; a thin bead of glue and brads secure the plate to the feet. The assembled unit is then screwed directly to the case bottom with the unit sticking out in front of the case. The look is completed by wrapping a molding around the case. An example of this type of connection is seen in the opening photo, although you cannot see the plate. That’s by design. As you see in the drawing, the cutout for the plate does not blow through the end of the foot.
The last method – the option that I find the most used as I look back at furniture I’ve built throughout the years – is to attach the feet to a base frame which is then attached to the case. 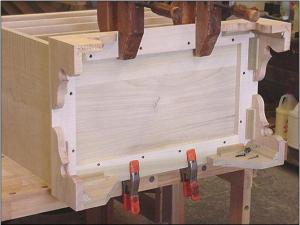 I used this method on the Pennsylvania blanket chests in the August 2009 issue of Popular Woodworking Magazine (#177) and the Serpentine chest from issue #195 (February 2012). As you can see in the right-hand photo, the same idea of glue blocks is used – mainly for reinforcement in this case. The frame is attached to the front of the chest with screws, but the remaining frame is nailed to the case bottom to allow for seasonal adjustments. The look is then completed with a transition molding.
These are three good methods used to attach feet to cases. There are pros and cons to each, as there is with any technique used in woodworking. Whenever you here, “This is the only way to do it, run in the opposite direction. You have choices.
Build Something Great!
Glen


